The Legend of Zelda: Tears of the Kingdom has many shrines that typically have more than one solution for solving their puzzles, enabling you to use the tools you've gathered before entering the Shrine to give yourself an advantage in ways that can make you feel like you've cheated the system.
But what happens when entering a Shrine takes everything away from you, leaving Link with nothing but his boxers, having him scavenge for resources to best enemies and reach the exit? That's precisely what happens with Rasitakiwak Shrine, found just north of Kaepora Pass, making it one of the game's more unique Shrines.
Rasitakiwak Shrine (Proving Grounds: Vehicles) Walkthrough

There are no puzzles within the Rasitakiwak Shrine, as your goal will be to eliminate roughly ten Training Constructs while scavenging for weapons or utilizing your Abilities to access vehicles to run them over for lots of damage.
While utilizing the vehicles is fun, we found that brute forcing your way through via combat is the fastest and most effective way to tackle this Shrine, which we will demonstrate in the sections below!
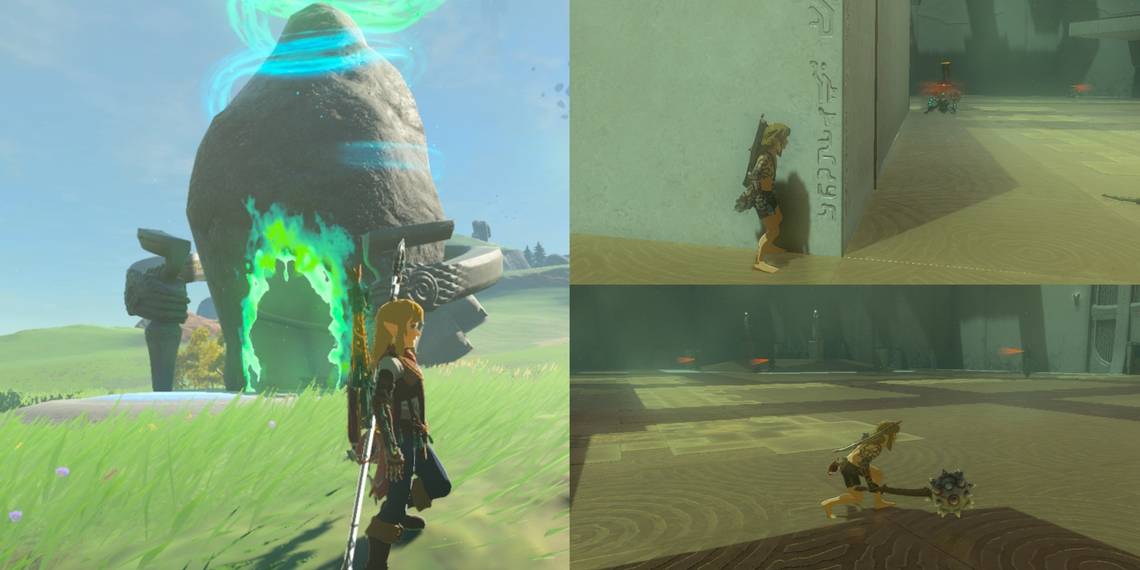
Rasitakiwak Shrine: Introduction

As covered above, you will be stripped of your possessions when you enter the Rasitakiwak Shrine (don't worry, you will get everything back if you exit or complete it).
However, after you proceed down the steps, you will find an Old Wooden Bow, a Wooden Stick, a Thick Stick, and a few Bundles of Arrows to your immediate left, so be sure to pick those up as they are crucial to this strategy.
Rasitakiwak Shrine: Training Constructs

With the weapons in your possession from the beginning of the Shrine, make your way toward the right side of the arena, which will give you a view of four Training Constructs. One will be placed on top of a vehicle, while the others will be standing on the ground.
Before attacking any of them, you must be made aware of the following: Some Training Constructs will have a long banner-like object sticking out of their head, signifying they are the Scouting Constructs, and will alert nearby Constructs if it spots an intruder.
Not only are these Constructs annoying, but they will also take lots of damage to eliminate, so you must approach them carefully and strategically, or you will be in a world of hurt if any nearby Constructs hear its siren go off.
Rasitakiwak Shrine: Using Your Bow And Arrow
Fortunately, the first Construct you face positioned on the vehicle is not a Scouting Construct, so you can safely fire an Arrow into its head to stun it and then another one to finish it off. Dispatch it quickly and then move toward the one at the corner of the large cell in the middle of the room.
Unfortunately, this Construct is a Scouting Construct, but you can shoot several Arrows at its head to deal significant damage and stun it, then finish it off with your Thick Stick. Don't use all of your arrows here; you will need them for the next Scouting Construct.
After you dispatch the Scouting Construct, look to your right and defeat the two Training Constructs on the raised floor. You can sneak around them and use your Thick Stick to eliminate them quickly.
Rasitakiwak Shrine: Spiked-Iron-Ball Hammer


Next, there will only be two Constructs near each other, one will be underneath a large platform raised high into the air, and the other will be positioned at the other corner of the cell in the center of the room. Your target will be the Scouting Construct at the corner of the cell.
Like the last one, unload the rest of your Arrows into its head, then swiftly finish it off with your Thick Stick. It's okay if the siren goes off as the only Construct nearby that can hear and respond to it is the one underneath the platform, a standard Training Construct.
Defeating this Scouting Construct will have it drop its Spiked-Iron-Ball Hammer, which will be what you use for the remainder of the Rasitakiwak Shrine. This weapon is a beast. It's incredibly durable and deals an enormous amount of damage to all Constructs.
After picking up the Spiked-Iron-Ball Hammer, make your way over to the Construct underneath the platform and give it two solid smacks to destroy it, leaving only a handful left.
Rasitakiwak Shrine: Eliminating The Remaining Enemies


There should be roughly four Constructs left, two of which will be Scouting Constructs. However, you possess the Spiked-Iron-Ball Hammer, so it won't matter all that much.
Still, we strongly recommend still being a bit stealthy here as you do not want the Scouting Constructs alerting the remaining enemies and having a swarm of four chasing you down.
As you approach the back of the Shrine from where you defeated the Construct underneath the platform, you will see two Constructs near the wall and two more on the raised floor. Prioritize the ones by the wall first, which you can sneak up to and dispatch with your new weapon.
From there, the last two Constructs will be on the raised floor and will have their back toward you. Sneak up to them and land a Stealth Attack to eliminate them quickly. If one spots you, it's fine, these are the final two enemies, and your weapon will make quick work of them.
After you defeat the final two Constructs, you will get your items back and can claim your rewards by going through the gate that has opened in the back of the Shrine.
Rasitakiwak Shrine: Rewards

Open the Treasure Chest found just before the exit to receive a Magic Rod with an Attack potency of six. While that seems low, remember that Magic Rods get their strength from attached Gems that allow them to cast a variety of Elemental Damage Types. Next, interact with the statue to receive your Light of Blessing to complete the Rasitakiwak Shrine!