The Legend of Zelda: Tears of the Kingdom's Jiukoum Shrine is a test of your engineering aptitude that starts fun but can end in complex tragedy as you throw yourself over the rails again and again to find a method of travel that works. If you're here, you've probably encountered such an issue. Don't worry; we have your solution.
Located in the Popla Foothills of West Necluda, Jiukoum Shrine is a checkpoint for those who are questing to find the man who will open the nearby Skyview Tower. However, it's no pushover, and you'll need every ounce of ingenuity with you when you attempt this puzzle.
How To Complete Jiukoum Shrine: Built For Rails

In the first room, you'll be given two sheets of metal on the floor near a set of rails. This portion of the puzzle is only here to teach you about sliding on rails, so it's quite simple.
Put the two sheets of metal together in a pseudo-bridge and place them across the rails. As you let go, jump on for a free ride into the next puzzle.

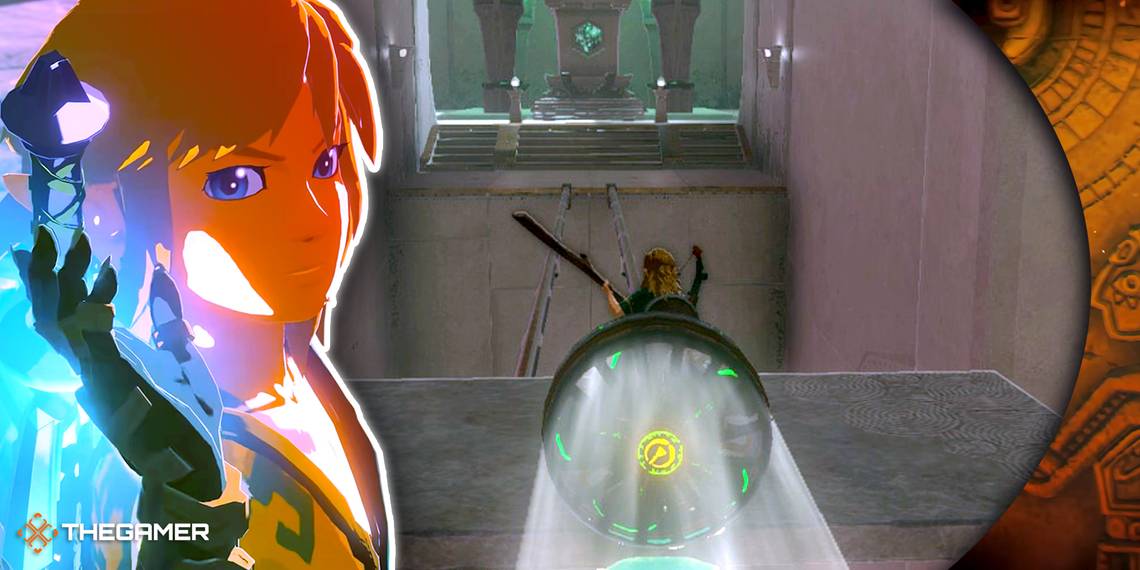
Here, there are several sheets of square metal on the ground to the left of the rail, and a long metal platform will fall onto the rails periodically.
Beside the metal sheets is a short, second set of rails that lead to a chest on an upper platform.
Use the metal you stuck together in the previous puzzle with the sheets of metal on the ground to create a small bridge over to the chest. Inside is the very useful Sticky Elixir.

Descending from the chest, take back the metal sheets and detach them from one another. After you do so, grab the metal sheet falling onto the rails and bring it over to begin building.
You'll want to place one metal sheet vertically in the center of the long piece. Your construction should look like a 'T'.
Place it on the rails with the long bottom part in the middle and jump on.

Keeping yourself placed in the center of your creation, ride this contraption all the way to the end for the final and hardest of the puzzles.
You have access to several pieces of metal here, but focus first on one of the long sheets. Keep it flat on the ground and place three shorter, square pieces in a vertical position on the left and right sides and then in the center. Your creation should look like two upside-down U's.
The reason we place these pieces like this is to keep you on the rails on the left and right side, but when the two outer rails end on either side, you'll need the centerpiece to catch on the third rail path in the middle.
If your centerpiece is off by even a little to either side, your creation will not work.
On the other side of the rails, there are three Zonai fans. Place them on your contraption on the left, right, and middle on the back end, and make sure they're placed on top of the contraption. If you place them too low, they'll catch on the rails.
Jump on and strike the fans to turn them on. This will power Link up the hill, jump onto the next rail path, and lead you all the way to the exit.